DIY Farmer’s Market Tote Bag With Laura Prietto
Spring is finally here and we couldn’t be more excited; days spent enjoying the warm sunshine and the cool Spring breeze while listening to the chirping of the birds. These sweet Spring days mean many outdoor adventures with our kiddos.
One of our favorite Spring adventures are trips to the Farmer’s Market. We love having our little ones help us shop for delicious fresh fruits and vegetables, fresh cut flowers, and of course sweet treats. With these trips in mind, our friend Laura is back with another sweet and easy craft to make the trips to the Farmer’s Market a little extra special. She created these simple, but so adorable, tote bags to help you and your kiddo carry all of your market finds!

Supplies:
-Tote Bag
-Fabric Scraps
-Scissors
-Fabric Glue
-Needle
-Thread
Step 1: Gather your supplies
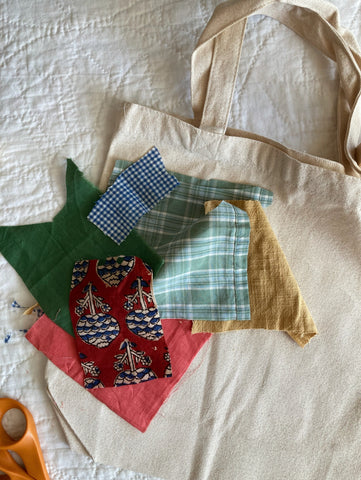
Step 2: Using your scrap fabrics, cut out the shapes of your favorite fruit (blueberries, strawberries, lemons, etc).

Step 3: Using the fabric glue, glue your cut shapes together to create the fruit designs. You can also use the needle and thread to add extra details (ex: on the strawberries)

Step 4: Easy Embroidery: Using your tape, cut out letters. Place them on your tote bag. Using the needle and thread, use the tape letters as a guideline and stitch around them. Take the tape off and you have a sweet embroidered tote! Next, glue the fruit shapes you created onto the tote bag.

Step 5: Enjoy your newly created shopping tote!

While we created this tote bag with the Farmer’s Market in mind, it can be made and decorated however you and your kiddos can imagine. Using these same supplies and simple guide, the design options are endless. Let your creativity shine.
We can’t wait to see what you create, so please tag us on Instagram @lalikids to share your sweet creations with us!
Follow Laura @_laura_prietto to get inspired for more simple crafts to do with your little ones.